I will admit I bought this rare Clio 172 on a whim because of a small fault I thought I could fix. It was more dramatic than expected - a blown engine, a bargain replacement, and a decision to rebuild rather than scrap. In true fashion-magazine style I treated the garage like a wardrobe: a little paint, a careful selection of parts from Febbe, and a meticulous timing routine. This is the story of how I rescued a hothatch and tried to make it beautiful again.
The Rescue Purchase - Why I Couldn’t Let It Die
I didn’t set out to buy a full-on Clio 172 engine rebuild project. I genuinely thought I was picking up a tidy little fix—one of those “sort it in a weekend” jobs. But this wasn’t just any Clio. It was a super rare Renault Clio 172 Exclusive, instantly recognisable in that distinctive Clear 172 colour scheme, and it had the sort of presence that makes you stop and stare.
From “small issue” to a completely blown engine
The reality hit hard: the engine was properly blown. Not “running rough” blown—more like “it’s coming out of the bay” blown. For a lot of people, that’s the point where the calculator comes out, the enthusiasm disappears, and the car gets broken for parts. In the UK, it happens all the time: another rare hot hatch quietly disappears because it’s easier to scrap than save.
But I’ve always had a soft spot for these Clios. They’re simple, raw, and brilliant on track when they’re right. And because this one was an Exclusive, it felt wrong to let it die just because the engine had given up.
The £300 “mystery engine” decision
I knew the comments would come in: “Rebuild the original engine.” I get it—I’m the same when I see a rare car being saved. But time was against us, and these 172 engines are still surprisingly easy to find. So we sourced a replacement unit for around £300.
Cost: roughly £300 for a complete 172 engine
Mileage: guessed at about 103,000 miles
History: no compression numbers, no paperwork, no promises
On paper, it’s a gamble. In my head, it was the only sensible way to keep the project moving and keep this Clio 172 Track Chic Revival UK dream alive. Because sometimes ownership isn’t about pure economics—it’s about refusing to be the person who lets a rare one get lost.

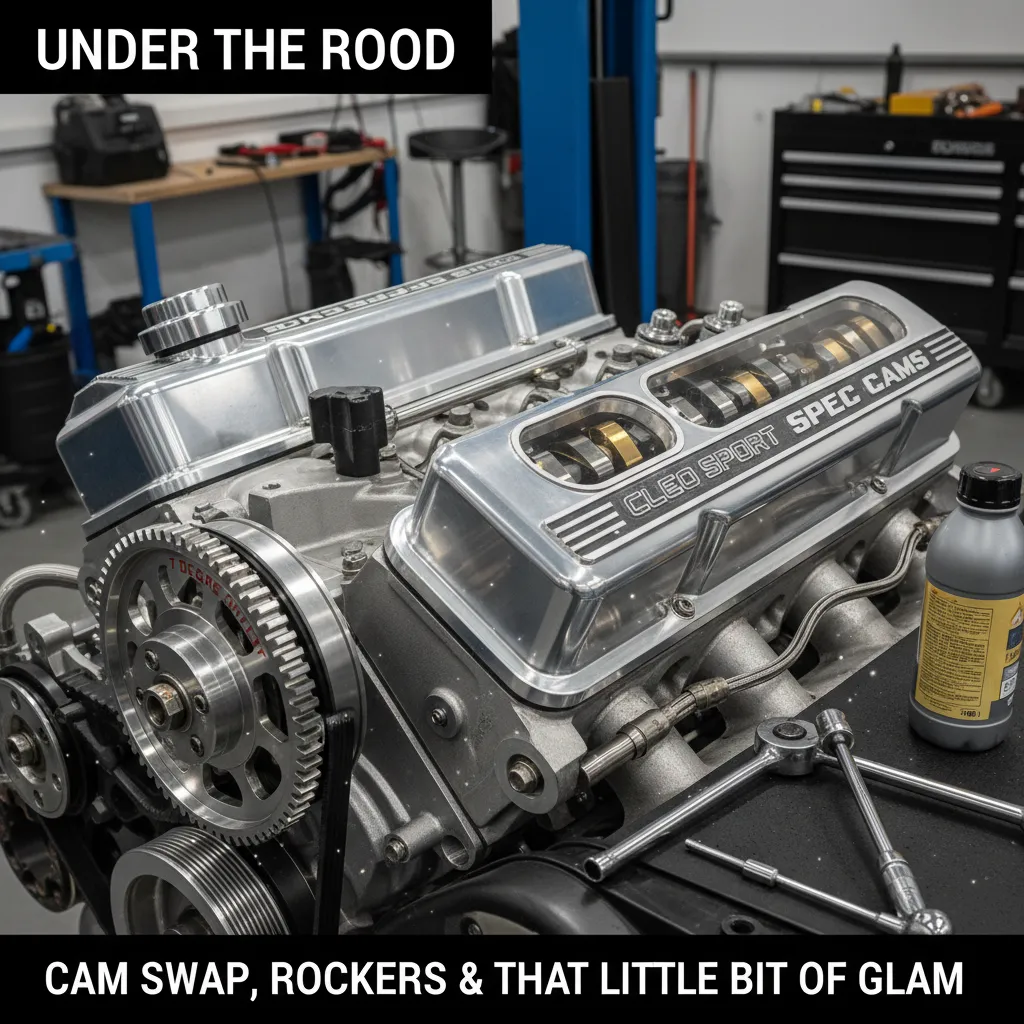
Under the Hood - Cam Swap, Rockers and That Little Bit of Glam
With the replacement Renault Clio 172 engine on the stand, I went straight for the upgrade that gives the biggest grin-per-pound: a cam swap. The later Clio Sport 197/200 cams have a slightly spicier profile, mainly more duration, which helps the engine breathe harder up top without turning it into a horrible idle monster. It’s one of those mods that still feels “OEM+”, just with more attitude.
197/200 Spec Cams: More Duration, More Urgency
The plan was simple: fit the newer cams, set the timing properly, and give this Clear 172 revival a proper track-chic heartbeat. Even though this engine was a bit of a mystery (stored outside, no history, no compression numbers), the top end came apart cleanly enough. It looked grubby in places, but nothing that screamed “walk away”.
New Rockers + Pre-Soaked Followers to Kill the Clack
While I was in there, I didn’t want to reuse tired bits and then wonder why it sounded like a bag of spanners on first start. So I fitted new rockers and new hydraulic followers from Febbe. The followers are oil-filled, and if you fit them dry you’re basically inviting that nasty clacking noise until oil pressure catches up.
I pre-soaked the hydraulic followers in fresh oil before fitting them. It’s a small step, but it’s the sort of detail that makes a rebuilt Clio 172 engine feel tight and cared for.
Timing: The Fiddly Bit (With a 7° Intake Offset)
Once the shiny bits were in, it was all about valve timing. These engines can be proper fussy, especially with floating pulleys that only “lock” when torqued. I used the correct Renault timing tools and took my time, because one slip here can ruin your day.
Static timing set with the proper locking tools
7 degree intake offset to suit the 197/200 cams and wake it up
Careful sealant work on the rocker cover (no traditional gasket)
Bolts tightened in the numbered torque sequence to avoid leaks and warping
It’s not glamorous work, but seeing those later Clio Sport cams sat in place, with fresh rockers ready to do their thing, is my kind of engine bay glow-up.
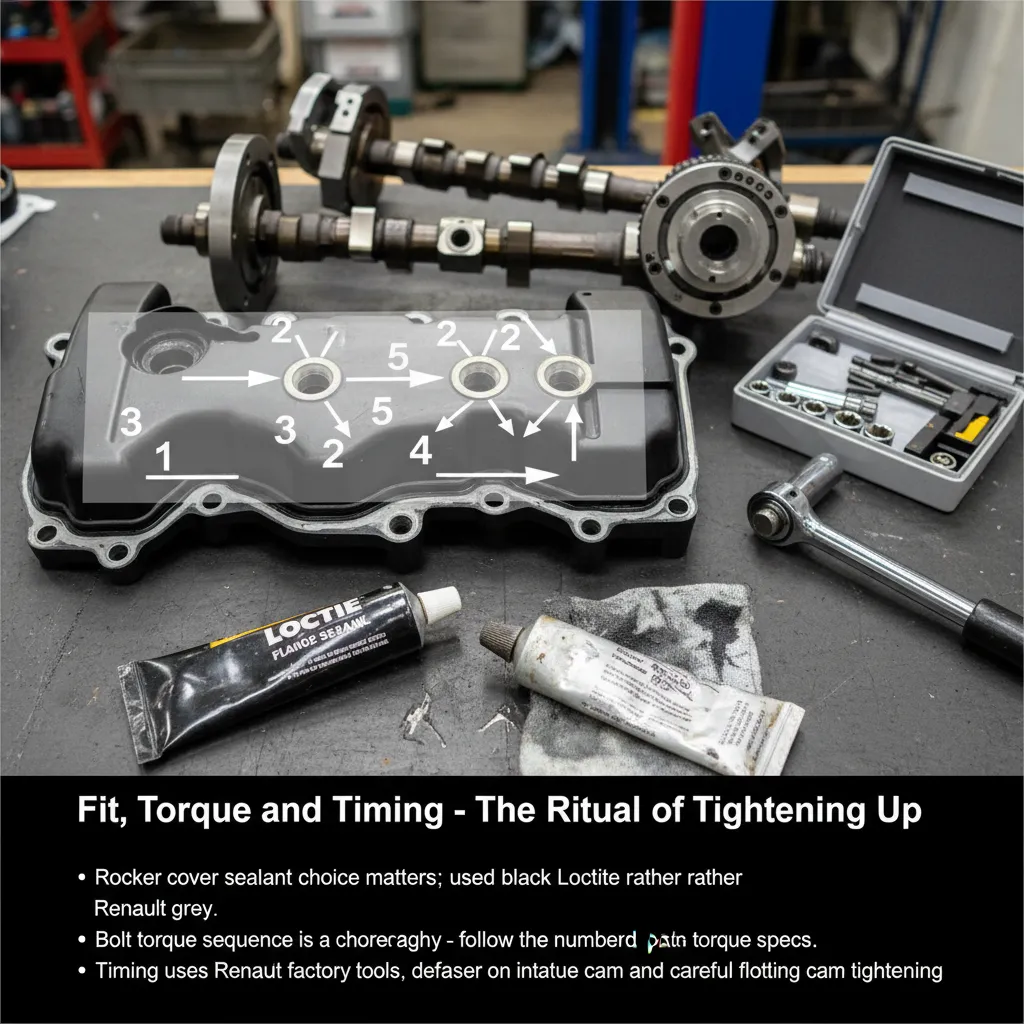
Fit, Torque and Timing - The Ritual of Tightening Up
Once the spicier cams, new rockers and fresh hydraulic followers were in, it was time for the part I treat like a ritual: sealing it up, torquing it down, and setting the timing on this Clio 172 engine rebuild. It’s the difference between a clean, quiet runner and an oily mess that clacks like a taxi.
Rocker cover sealant: the small choice that makes a big mess
These F4R tops don’t give you the comfort of a normal gasket, so the sealant choice really matters. Instead of the usual Renault grey, I went with black Loctite. It lays nicely, skins over well, and gives me confidence around the corners and the half-moons where leaks love to start.
I kept the bead simple and consistent—no overdoing it—because too much sealant doesn’t “seal better”, it just squeezes out and ends up where you don’t want it.
Bolt torque sequence: a choreography, not a guessing game
With the cover offered up, I followed the numbered tightening pattern like it was printed on my forehead. This isn’t the moment for “that’ll do”. Even pressure is everything, especially when you’re relying on sealant.
Start all bolts by hand
Work through the numbered sequence
Tighten in stages to the proper torque spec
Rushing this is how you warp things, pinch sealant, or create a tiny gap that turns into a full-on weep once the engine gets hot.
Timing: Renault tools, defaser pulley, and floating cam nerves
Timing the Clio 172 is the bit that makes you go quiet. I used the proper Renault factory timing tools to lock everything where it should be, then dealt with the defaser pulley on the intake cam. The tricky part is the floating cam pulleys—they only fully “commit” when tightened, which means they can shift right at the worst moment.
So I tightened the critical cam bolts gradually, checking and re-checking as I went, aiming for around 110 Nm on the big fasteners. It’s slow, fiddly work, but it’s how you avoid snapped bolts, chewed threads, and timing that’s a tooth out.
Clutch, Water Pump and Workshop Style
Clever and chic clutch alignment
With the engine out on the stand, it made sense to sort the clutch properly rather than fight it in the bay later. I was fitting the clutch, pressure plate and flywheel, and the only thing standing between me and a smooth gearbox install was getting the plate centred.
I didn’t have a fancy alignment tool to hand, so I made my own. I grabbed an old ratchet and used it as a DIY centring tool, offering it up through the clutch plate to keep everything lined up while I nipped the bolts down. It’s one of those simple little workshop hacks that feels proper when it works.
DIY alignment tool: old ratchet pressed into service
Goal: centre the clutch so the gearbox slides on without drama
Result: neat fit-up and less swearing later
Fresh water pump while access is easy
Next up was the water pump. On an F4R, doing a water pump with the engine installed can be a nightmare, so I wasn’t about to miss the chance while everything was wide open. I fitted a fresh pump (the engine was already looking more “correct” and tidy), torqued it down properly, and made sure the mating faces were clean so it stays dry.
While I was there, I also fitted a new auxiliary belt. It’s cheap insurance, and it just makes sense when you’re building a track-ready Clio 172 engine that you actually want to trust.
Purple floor, proper vibe
I know it’s an engine rebuild, but the garage aesthetic mattered too. I wanted the space to feel like a workshop and a studio—somewhere worthy of a rare Clear 172 Clio 172 Exclusive getting a second life.
Auto Resin UK sorted us with a custom resin floor in purple, and it genuinely changed the whole feel of the place. Under the lights it looked runway-ready, and it made the engine work feel that bit cleaner and more “Track Chic Revival UK” than just another cold concrete rebuild.
Lessons, Costs and Trackside Daydreams
This rebuild has reminded me that nothing on a Clio 172 is ever truly “one and done”. The biggest lesson was timing: it’s not a single heroic moment with the tools on and the bolts nipped up. It’s a slow loop of set, check, tweak, check again. Those floating pulleys can move when you least expect it, and one tiny shift can turn a confident afternoon into a long night. I learnt to treat patience like a proper part of the build—right up there with oil, sealant and torque settings.
What it really costs to save a rare 172
I bought the car thinking it needed a small fix, then found a fully blown engine. That’s the reality with old hot hatches: the cheap purchase price is often just the entry ticket. The replacement 172 engine was around £300, which is why swapping made sense when time was tight. From there, the spending becomes a series of “while we’re in here” decisions—cambelt bits, water pump, clutch parts, fluids, seals, followers, and the little Renault-specific pieces that add up fast.
If you’re planning similar, I’d budget in layers. A basic refresh can be hundreds, but if you go deeper—headwork, machining, porting, and a proper map—you’re quickly into the low thousands depending on how far you take it and what you can do yourself. I’m not pretending it’s the cheapest route, but saving a Clear 172 feels worth it.
Track chic: the next chapter
Now that it starts and lives again, my mind keeps drifting to track days. The wish list is already forming: a bit of porting, a sharper induction setup, and then the sensible stuff that makes it fast for longer—big brakes, decent coilovers, and maybe a half roll cage to finish the look and add some confidence.
For now, I’m just enjoying the fact it runs—because bringing a rare Clio back from the dead is a win on its own.